按照Installing Spring Boot把Java、Maven环境装好。
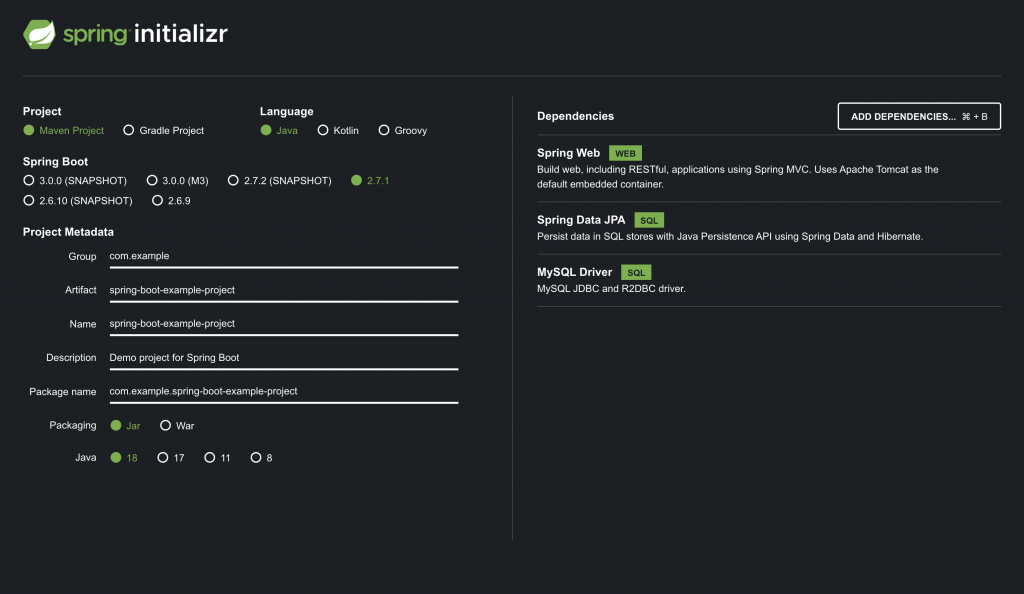
接下来通过Spring lnitializr创建骨架项目:根据我的配置,如下图设置:

然后在下面的Download按钮下载,并通过IDEA打开这个项目;
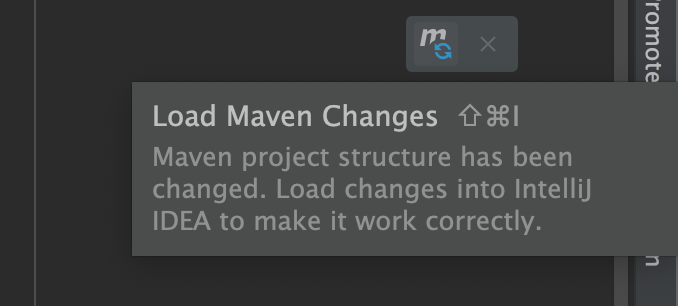
打开项目后先进入到:pom.xml点击一下右上角漂浮的Load Maven Changes按钮。

拉取完毕后在src/main/java/com.xxxxx目录下,创建类:UserController
package com.example.xxxx;

import org.springframework.web.bind.annotation.GetMapping;
import org.springframework.web.bind.annotation.RequestParam;
import org.springframework.web.bind.annotation.RestController;

@RestController
public class UserController {
    @GetMapping("/")
    public String get(@RequestParam(value = "name", defaultValue = "Yu") String name) {
        return String.format("Hello %s", name);
    }
}如果用的是上面的生成的骨架的话,默认会带有SpringBootExampleAppApplication类,直接运行该项目,如果没有可以创建一个,或者在UserController下增加一个注解且加一个主方法:
package com.example.xxxx;

import org.springframework.boot.SpringApplication;
import org.springframework.boot.autoconfigure.SpringBootApplication;

@SpringBootApplication
public class SpringBootExampleAppApplication {
	public static void main(String[] args) {
		SpringApplication.run(SpringBootExampleAppApplication.class, args);
	}
}
接下来就运行项目,如果使用的是IDEA的话,直接可以点击左侧的运行按钮。

如果没有的话,可运行:
mvn spring-boot:run运行项目后将会默认占用8080端口,访问:http://localhost:8080
则会打印:Hello Yu
访问:http://localhost:8080/?name=World
则会打印:Hello World
如果需要修改默认占用端口,使用生成的骨架下,在src/main/resources下编辑application.properties文件,增加下面一句:
server.port=8090重新启动项目后,占用的端口就变成8090了,需要访问:http://localhost:8090